How Do I Add a Product's Separator Header Template?
- Log in to the Control Panel. Click the Design tab.

- Locate the Templates section. Select the New Template icon (
 ) to the right of the Template Storage icon (
  ). The New Template Panel will appear.
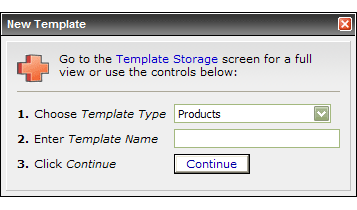
- Select Products from the dropdown menu displaying the Template Type. Enter a name for your Product Template. Click Continue (
 ). You will be transferred to the Product Template Control Panel.
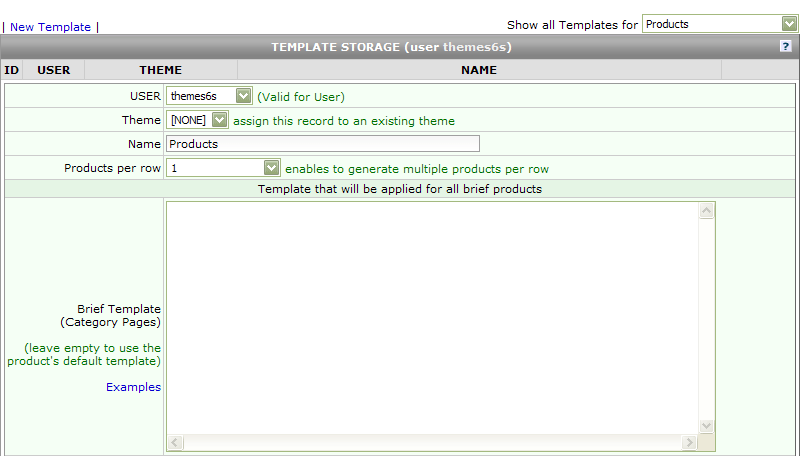
- Scroll down to locate the field labeled Separator Header Template (optional). Copy and paste your Product's Separator Header Template code from your HTML editor into the box beside it. Click Save (
 ) at the bottom of the page. You will be transferred to the Product Templates table.

- Next, compile all images that are used in your Product's Separator Header Template into a .zip file saved. Be aware of its name and location on your personal machine.
- Click the Content tab.

- Click the New File icon (
 ) to the right of the Website File Storage icon (
  ). The New File Panel will appear.

- Select the proper Folder where you would like to upload the your images. Click Continue ( ). You will be transferred to the Website File Storage table.
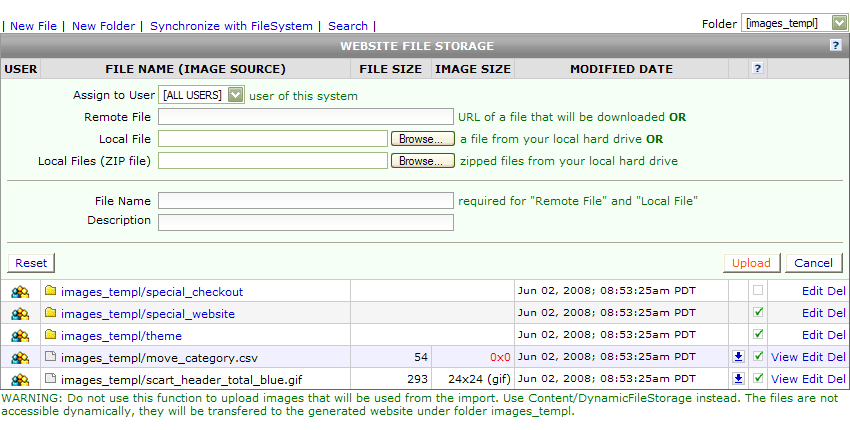
- Select Browse to the right of Local Files (ZIP file). This will open a panel where you may locate your .zip file. Once you have selected it, click Upload (
 ) to add it to the Website File Storage. You will be transferred back to the Website File Storage main table.
- Click the Settings tab.

- Click the Edit icon (
 ) to the right of the Per User icon (
  ). An Edit User Settings Control Panel will appear.
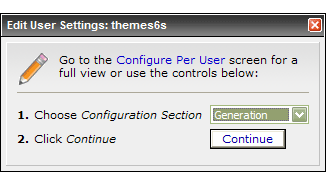
- Select Generation from the Configuration Status dropdown. Click Continue ( ). You will be transferred to the Configuration Per User Control Panel.
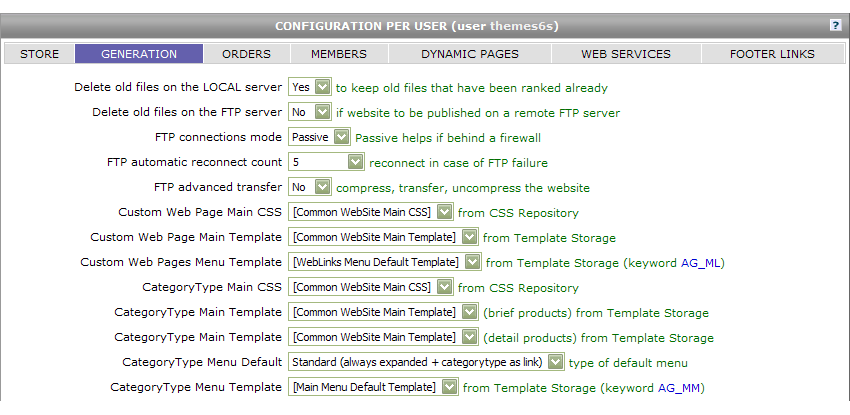
- Locate the dropdown next to CategoryType: Product Template. Select your new Product Template from the list.
- Click Update (
 ) at the bottom of the page to successfully complete the addition of your new Product Separator Header Template.